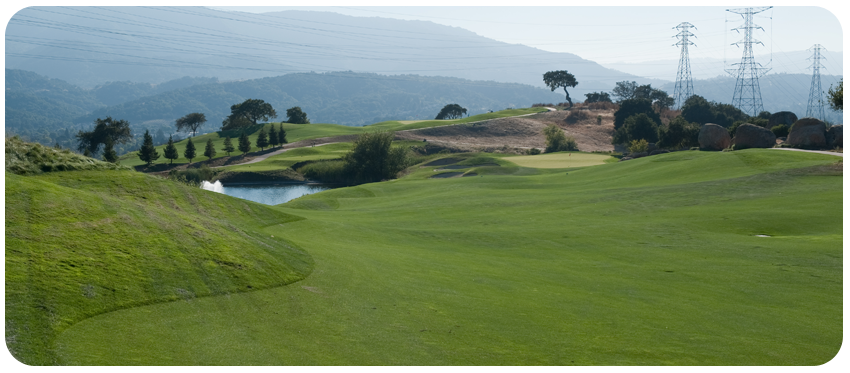
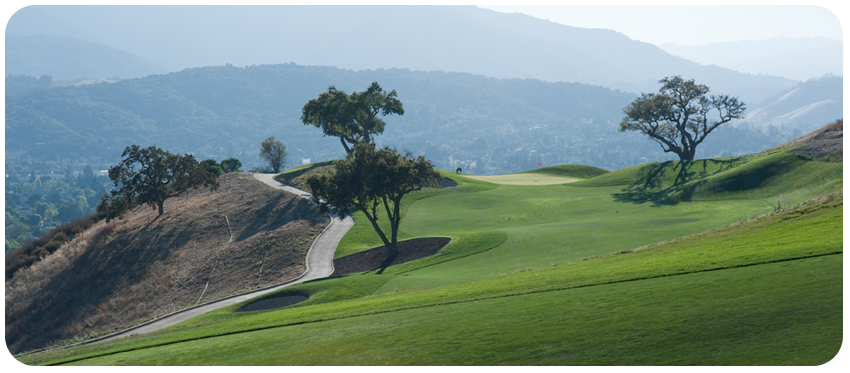
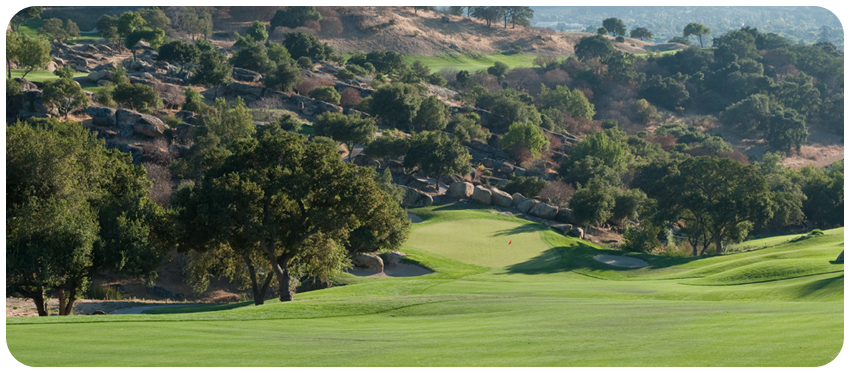
 Hole 1 - Stonecutter:
The course begins with a friendly opening hole. A drive down the left side of the fairway will open up a good angle to the green and longer hitters will have a good chance to go for it in two shots. If you are laying up, aim down the right side as the ball will funnel back to the middle of the fairway to set up a short pitch to the green.
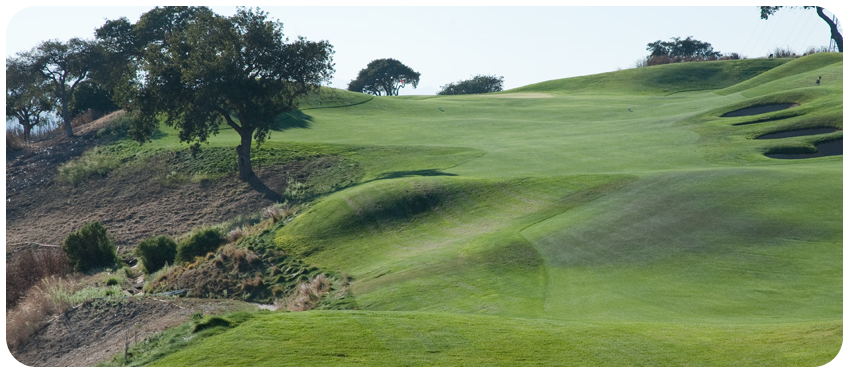
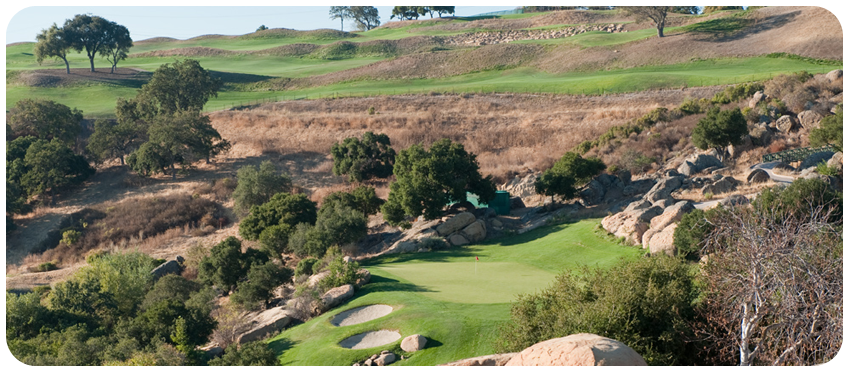
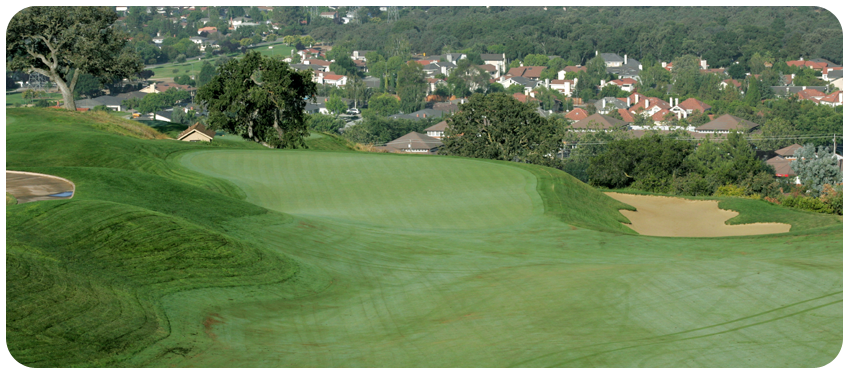
 Hole 2 - Indian Maiden:
After you have gotten over the beauty of this stunning golf hole, you are faced with one of the most challenging tee shots on the course. The tier that divides the green makes putting from one side to the other very difficult. Taking into account the amount of trouble and obstacles on this hole, the bunker should be considered a safe miss. Par is an awesome score.
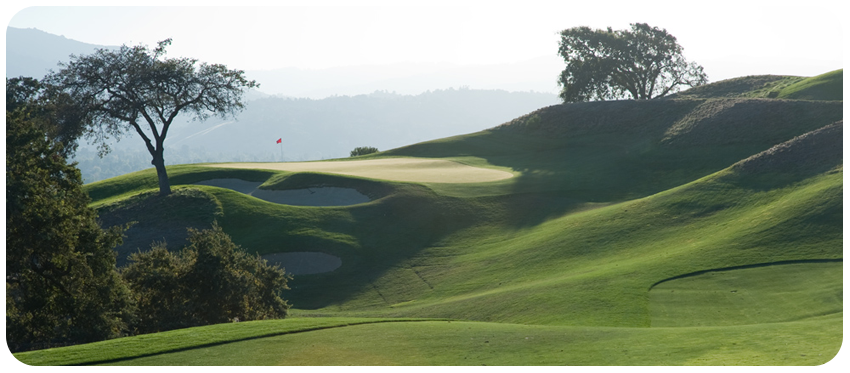
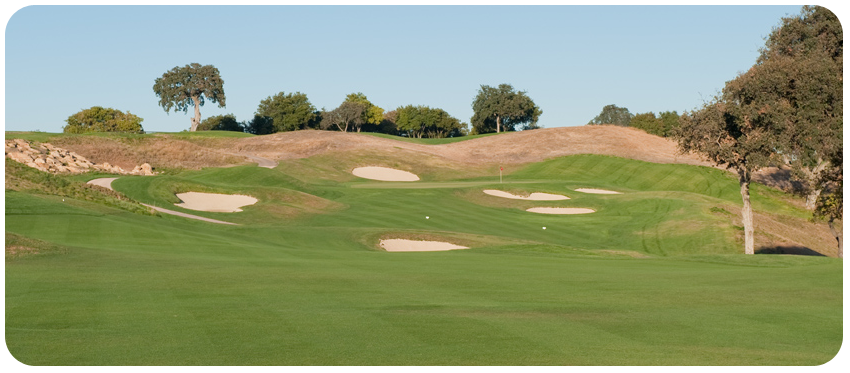
 Hole 3 - Turkey Crossing:
The toughest par 5 on the course plays uphill most of the way. The four bunkers on the left are very deep and should be avoided at all costs. As you advance up the fairway, the safe play is to aim down the right side although it opens up beyond the bunker on the left. Players thinking they have the power to go for the green in two have to carry several hidden bunkers near the green short and left that will make them wish they had laid up. Played as a three shot hole, par is a good score.
 Hole 4 - Land Grant:
The best chance to score well on this hole is from the lower tier of the fairway before the cart path, leaving you about 160 yards to the green. Some players will need to lay up from the tee in order to keep from hitting the ball too far, which will result in a very challenging, side hill / down hill lie. Keep the approach shot on the left side to avoid the bunker and be sure to club down to make up for the elevation change. In order to have success on this hole, course management is a must.
 Hole 5 - Quick Silver:
This relatively short par 4 offers ample room off the tee. For the longer player, over the tree on the left will leave you less than 100 yards from the center of the green. Shorter hitters should aim between the tree and the bunkers. From the fairway, the green is elevated and requires at least one more club than indicated by the yardage. This is a great hole to hit a low running shot into the green with the sides of the hills helping your ball find the putting surface. Good birdie and par chance here.
 Hole 6 - Olmsted Challenge:
Intimidating from the tee, a well placed drive will make our number one handicap hole a push over! For the long hitter, over the tree is the play. With the four bunkers staring you in the face, the first bunker in the line up is only 155 yards from the middle of the green. With the uphill approach shot, take extra club. A miss to the right of the green is a much easier recovery than a miss to the left. The green is divided into a pair of plateaus with the back having more break and slope than the front.
 Hole 7 - Pepper Ridge:
Even though this hole is downhill, it plays the yardage on the card...sometimes even more with wind into you. The right side of the hole helps errant tee shots bounce back towards the green. The left bunker is very deep, but a better place for your ball than lost down the side of the hill. With the green divided into lower and upper levels, club selection is crucial.
 Hole 8 - Bricket's Run:
A real pushover...not! Drives should be directed down the right side to allow the ball to bounce back to the middle of the fairway. Longer hitters may run out of room by hitting driver so a fairway wood or hybrid might be the best play. Shots into the green play at least one club long, if not more. Middle and back hole locations play even longer. If you can’t reach the green, lay up of the bunker short and right of the green and pitch on to avoid a big score. Oh yeah…watch out for those boulders on each side of this demanding golf hole!
 Hole 9 - Bobcat Den:
With one of the widest fairways on the course, anything short of the bunkers on the right will leave you an open look at the elevated green. The hole plays uphill to the green and adding yardage to your approach shot will be necessary to avoid coming up short in the bunkers. With a fairly flat green, putts don’t break much. A nice finish to the front nine.
 Hole 10 - Deer Hollow:
On this slightly elevated tee box, direct your tee shot down the right hand side in order to give yourself a clear approach to the green. Longer hitters can hit driver over the tree with a chance to reach the green, but missing left can result in a lost ball. With the green well below the landing area, a low trajectory approach shot can be a very effective way to get the ball on the putting surface. The green is severely sloped from back to front and any putt that ends up above the hole will be very fast and hard to stop. This hole is a good birdie or par chance, but poor course management will cancel that opportunity quickly.
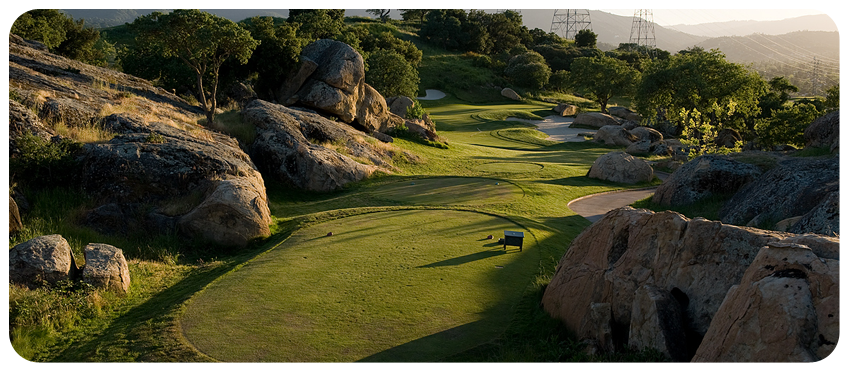
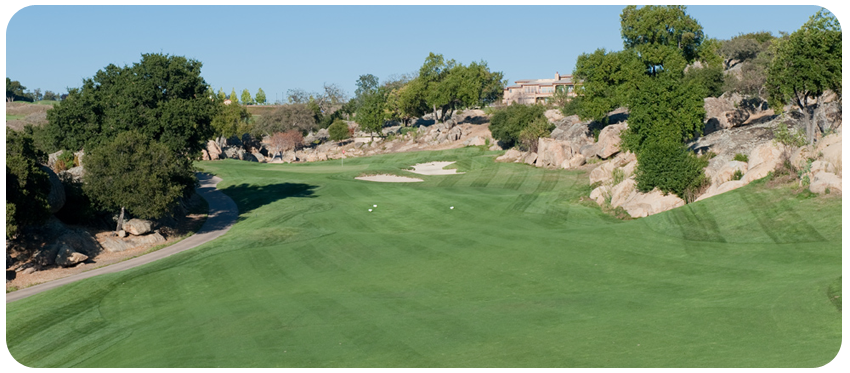
 Hole 11 - Rocks to Rocks:
Another spectacular view! This hole, aptly named, will test your nerves and courage as you get set to challenge this demanding par 3. It plays the yardage even though down hill, and shots landing in the middle of the green will funnel back down towards the front. This sloped green challenges even the best putters. Coming up short is not a bad play and allows you to have a good chance at making a short putt. A par on this hole usually wins a skin!
 Hole 12 - Sunset Quarry:
You are now looking at one of the narrowest fairways on the course. Tee shots hit down the right side tend to bounce back into the middle of the fairway and set you up for your next challenge. The green sits atop a small hillside, plays a club longer than the yardage, and is separated by a small tier for front and back hole locations. The front of the green has a false front and shots hitting the front portion of the green will roll off the green into the rough. Missing just right of the green is not a bad place from which to chip or putt. There is a lot of room on the back tier so don’t be afraid to club up to get back there.
 Hole 13 - As The Crow Flies:
Getting in the fairway here can be the toughest part of this hole, but once you do it’s the flattest fairway on the course. Make it easier on yourself and keep the tee shot down the right side. The putting surface looks fairly level, but slopes back to front more than you may think. The large green seems to be easy to read, but putts from the back portion of the green are very fast, and putts attempted from hole high have more break than expected.
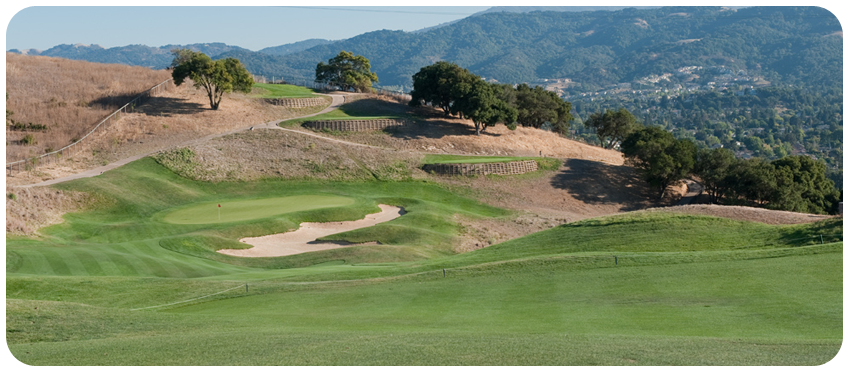
 Hole 14 - Cityscape:
The shortest par 3 hole at Boulder Ridge can be deceiving. Usually playing into a head wind or cross wind, this hole tends to play longer than the yardage. The large ridge in the middle of the green can be helpful as a back stop when the flagstick is located on the front of the green, but makes it hard to get the right speed if having to putt up it to get to the back tier hole location. Putts always break to the right when putting up the ridge. For the 18th handicap hole, it’s not the easiest hole on the course.
 Hole 15 - Valley of Heart's Delight:
Playing down the left hand side of the straightest fairway on the course will allow your ball to feed back to the middle. The bunkers short and right of the green catch a lot of shots just off the mark, so aim to the left and use the contour of the putting surface to feed your ball back to the middle of the green. The green is deep and slightly elevated, and may require an extra club. If you need to lay-up, keep you approach short of the bunkers or left of the green. For the longer hitters, a short iron into the green sets up a great birdie opportunity.
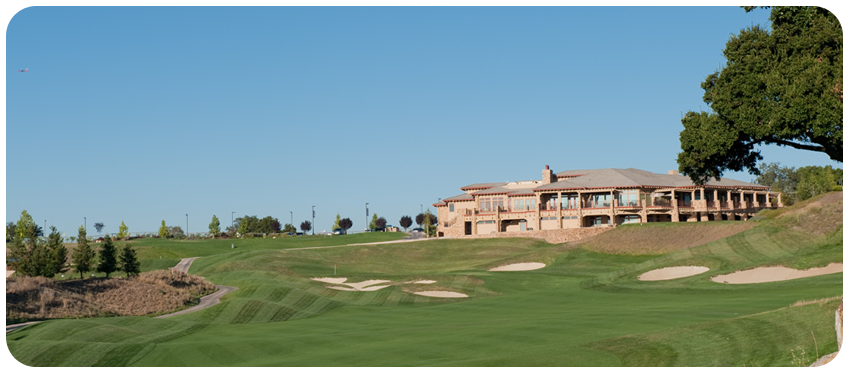
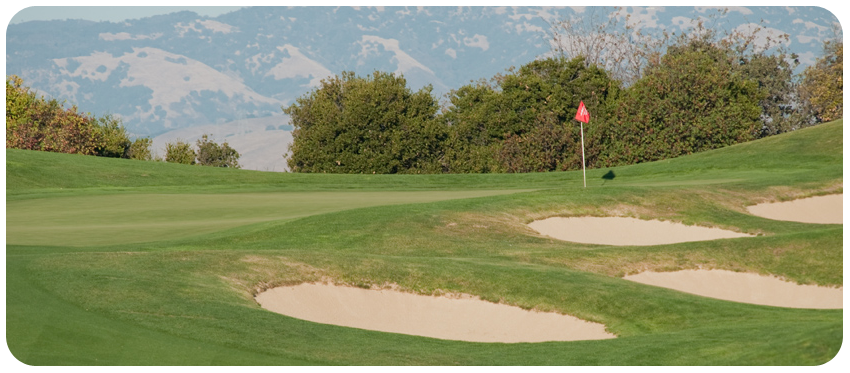
 Hole 16 - Weather Watch:
Favor the right side of this sloping fairway and your ball will most likely end up in the middle. The left fairway bunker is small, but very deep. Going for the green on your second shot is an option for longer hitters, but the risk outweighs the reward. The green has a VERY deep bunker that starts out guarding the right hand side and wraps around the back. Getting out of this one can be quite a challenge since you cannot see the green and barely the flagstick. The safe play is short and right of the green leaving a short pitch. Putts from the back portion of the green tend to be quick with more break than expected.
 Hole 17 - Sand Stone:
From the tee, there are 2 options here; bomb it over the bunker, or layup right of it. A ball in the left fairway bunker is a mistake. If you decide to layup, the left fairway bunker sits approximately 200 yards from the green. The fairway ends and the tan bark begins under the oak tree on the right only 25 yards after that. Taking a more aggressive line over the bunker can have its rewards, but the penalty for missing left or right is severe. With the elevated green complex, take extra club(s) on the approach. Most shots into the middle of the green will funnel back towards the front and to the right. Par here is a great score.
 Hole 18 - Glenda's Tree:
This hole is named after the owner of the club who fought hard to save this tree from removal in the original plans from the designer. A drive down the left side hugging the tree line is best as the fairway slopes to the right and delivers the ball back to the middle of the fairway. The right hand side of this hole is protected by a steep drop off. Depending on where you are in relation to Glenda’s Tree will determine whether you must go over, under, or around it. Be aware of the lurking fairway bunkers beyond the tree on the right side of the fairway. A low running shot into the left side of the approach area and green will make its way back to the middle of the green to set up your putt.
|
For more information contact the Membership Director at: [email protected] | Phone: 408-323-9900 ext. 109 © Boulder Ridge Golf Club | All Rights Reserved. |